Sure Jell recipes are a game-changer for anyone who loves the idea of homemade jams and jellies but feels intimidated by the process. Have you ever tasted a perfectly sweet, fruity spread and wished you could recreate it at home? With Sure Jell, you can! This pectin makes preserving fruit not just easy but also incredibly rewarding. Whether you’re capturing the essence of summer berries or giving leftover apples a new life, these recipes bring out the best in every fruit. So, grab your favorite fruits and let’s turn them into something magical—one jar at a time!
Key Benefits of Sure Jell Recipes
Making homemade jams and jellies with Sure Jell is like having a little kitchen magic at your fingertips. Not only does it help you achieve the perfect gel-like consistency every time, but it also simplifies the entire process, making it approachable even for beginners. Here’s why Sure Jell recipes are worth trying:
- Perfect Consistency, Every Time: Sure Jell takes the guesswork out of jam-making, ensuring your spreads are neither too runny nor too firm.
- Versatility with Fruits: Whether you’re working with classic berries, tropical fruits, or even seasonal favorites like apples and pears, Sure Jell works seamlessly.
- Preserving Made Easy: Its reliable formula helps you create long-lasting preserves that retain the fresh, vibrant flavor of your fruit.
- Healthier Options: You can adjust the sugar content without compromising texture or taste, making it ideal for low-sugar or healthier jam options.
- Cost-Effective: Store-bought jams can add up, but with Sure Jell, you can whip up batches at a fraction of the cost.
Whether you’re making a batch for your family or creating beautiful jars to gift, Sure Jell ensures success every time. It’s the secret ingredient to turning fresh fruit into something truly special!
Ingredients for Sure Jell Recipes

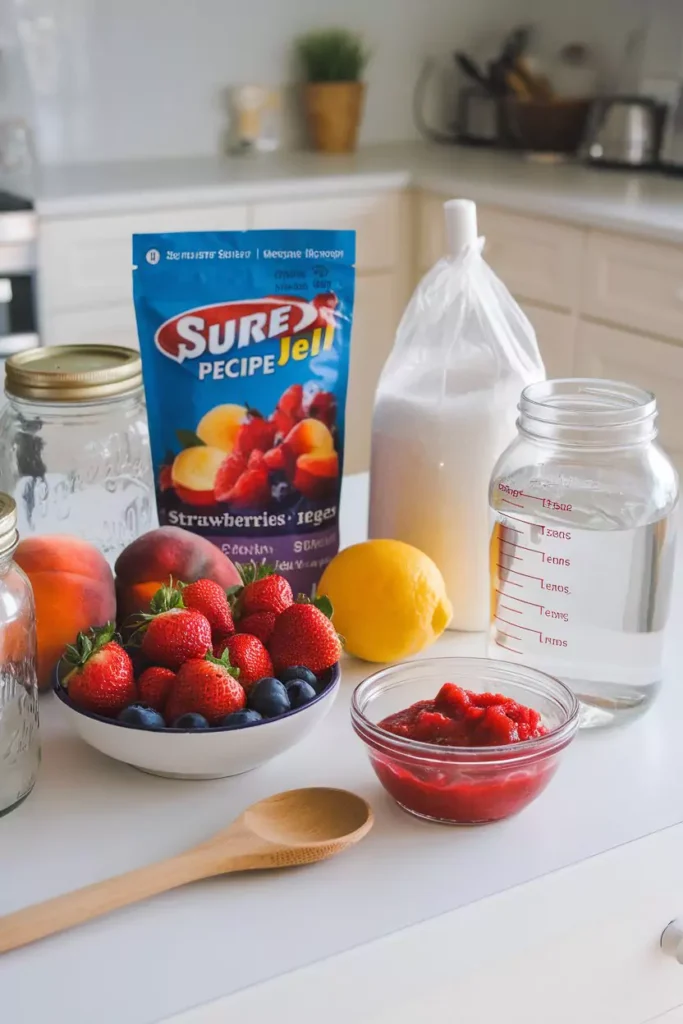
Let’s talk about what you’ll need to create delicious homemade jams and jellies. Don’t worry—this list is simple, and most items are probably already in your pantry or easy to find at the store. Here’s your must-have lineup:
Core Ingredients:
- Sure Jell Pectin: The magic ingredient that ensures your jam sets perfectly every time.
- Fresh Fruit: Choose ripe, high-quality fruits for the best flavor. Berries, peaches, apples, and even citrus fruits are great options.
- Granulated Sugar: Essential for balancing the tartness of the fruit and enhancing the flavor. Low-sugar recipes are also possible with Sure Jell’s low-sugar variety.
- Water: Used to dissolve the pectin and create the base mixture.
Optional Add-Ins:
- Lemon Juice or Citric Acid: Helps to enhance the natural flavor of the fruit and ensure proper acidity for preserving.
- Vanilla or Almond Extract: Add a hint of warmth and depth to your jams.
- Spices: Cinnamon, nutmeg, or even a pinch of chili powder can elevate your jam with unique flavors.
Tools You’ll Need:
- Large Pot: For boiling the fruit mixture and activating the pectin.
- Canning Jars with Lids: Sterilized jars are essential for proper storage and preservation.
- Ladle and Funnel: To make transferring your jam into jars mess-free.
- Jar Lifter: For safely handling hot jars.
Pro Tip: Always measure your ingredients carefully, as the balance between fruit, sugar, and pectin is key to achieving that perfect gel-like consistency. A little preparation goes a long way in making your jam-making experience smooth and enjoyable!
How to Make Sure Jell Recipes

Crafting your own Sure Jell recipes is not just easy; it’s a rewarding way to preserve the vibrant flavors of fresh fruit. Follow these clear and actionable steps to make your jam-making experience seamless and enjoyable.
Step 1: Gather Your Tools and Ingredients
- Essential Tools: Have a large pot, canning jars, lids, funnel, ladle, and jar lifter ready. A boiling water canner is ideal, but a deep stockpot works too.
- Prepare the Jars: Sterilize the jars by boiling them for 10 minutes or running them through a dishwasher cycle. Keep them warm to avoid cracks when filling with hot jam.
Step 2: Prepare the Fruit
- Wash Thoroughly: Clean your fruit to remove dirt or pesticides.
- Remove Stems and Seeds: For fruits like berries, simply wash and mash. For stone fruits or apples, remove pits, cores, or skins as needed.
- Mash or Chop: Use a potato masher for a chunkier texture or a blender for a smoother finish. Measure the fruit accurately for best results.
Step 3: Combine Fruit and Sure Jell
- Mix Ingredients: In a large pot, combine your prepared fruit and a packet of Sure Jell pectin. Stir well to ensure the pectin is evenly distributed.
- Add Lemon Juice: This step boosts the flavor and ensures the proper acidity for preservation.
Step 4: Bring to a Rolling Boil
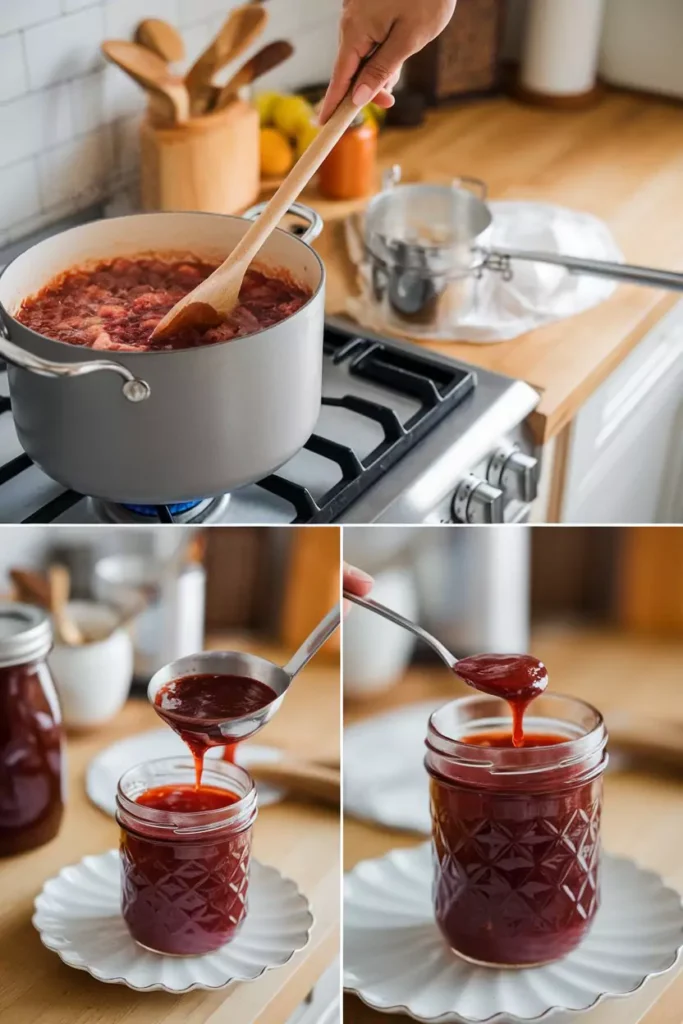
- Place the pot over medium-high heat, stirring constantly. Bring the mixture to a rolling boil, one that doesn’t stop bubbling even when stirred.
Step 5: Add Sugar and Boil Again
- Quickly Add Sugar: Pour in the measured sugar all at once, stirring constantly to dissolve.
- Boil for One Minute: Once the mixture returns to a rolling boil, let it boil for exactly one minute. Timing is crucial here!
Step 6: Test the Consistency
- Wrinkle Test: Drop a small amount of the mixture onto a chilled plate. Let it cool for a moment, then push it with your finger. If it wrinkles, your jam is ready. If not, boil for another 30 seconds and test again.
Step 7: Fill the Jars
- Transfer the Jam: Use a ladle and funnel to carefully pour the hot jam into sterilized jars, leaving about ¼ inch of headspace.
- Seal the Jars: Wipe the rims with a damp cloth to remove any residue, then apply the lids and bands, tightening them until just snug.
Step 8: Process the Jars
- Boiling Water Bath: Submerge the jars in a boiling water bath, ensuring they are fully covered. Process for 10 minutes (adjust for altitude if needed).
- Cool and Check Seals: Remove jars with a jar lifter and let them cool at room temperature. Check seals by pressing the lid—if it doesn’t move, the jar is properly sealed.
Step 9: Label and Store
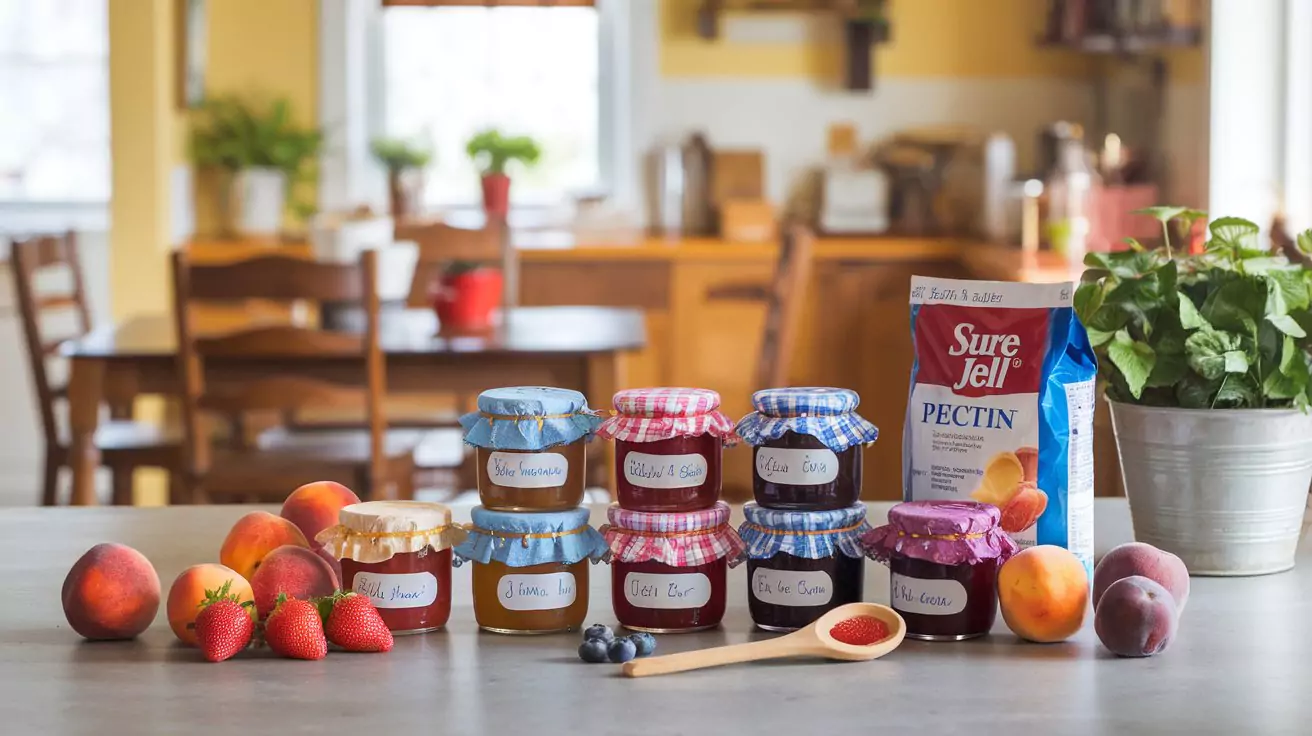
- Mark Your Creations: Label each jar with the date and flavor to keep track of your delicious batches.
- Storage Tips: Store sealed jars in a cool, dark place for up to a year. Once opened, refrigerate and enjoy within a few weeks.
Pro Tip: Don’t be afraid to experiment with flavor combinations! Strawberry-mint or peach-vanilla can add a gourmet twist to your homemade jams. Sure Jell makes it easy to create spreads that are not only delicious but also perfectly set every time.
Enjoy your homemade creations on fresh bread, pancakes, or as a sweet addition to yogurt or desserts!
Pro Tips and Variations for Sure Jell Recipes
To make your Sure Jell recipes even better, here are some handy tips and fun variations. These insights will help you troubleshoot, customize, and elevate your homemade jams and jellies to suit your taste and creativity.
Pro Tips for Perfect Results
- Measure Accurately: Precise measurements of fruit, sugar, and pectin are essential. Too much or too little of any ingredient can affect the set or flavor.
- Use Ripe Fruit: Overripe fruit may result in a poor set, while underripe fruit lacks sweetness. Aim for perfectly ripe fruit to balance flavor and texture.
- Stir Constantly: When bringing the mixture to a boil, keep stirring to prevent scorching and ensure an even consistency.
- Don’t Skip the Boiling Time: The one-minute rolling boil after adding sugar is crucial for activating the pectin and ensuring the jam sets properly.
- Test the Set: Use the chilled plate method to check the jam’s readiness. This prevents under- or overcooking your batch.
- Sterilize Thoroughly: Always sterilize jars and lids before use to avoid contamination and ensure long shelf life.
- Adjust for Altitude: If you live at higher altitudes, increase processing time in the water bath to ensure proper sealing.
Creative Variations to Try
- Flavor Twists:
- Add fresh herbs like basil or mint to strawberry or peach jam for a unique flavor.
- Enhance berry jams with a splash of citrus juice or zest for a bright, tangy kick.
- Stir in a pinch of spices like cinnamon, nutmeg, or ginger for warm, cozy notes.
- Low-Sugar Options:
- Use Sure Jell’s low-sugar or no-sugar pectin to create jams with reduced sweetness. This is perfect for those watching their sugar intake.
- Fruit Blends:
- Mix different fruits for delightful combinations. Some favorites include raspberry-peach, blackberry-apple, or mango-pineapple.
- Experiment with seasonal fruits for unique creations all year long.
- Texture Adjustments:
- For chunkier jams, leave some fruit pieces intact while mashing.
- For a smoother spread, puree the fruit or strain out seeds for seedless versions.
- Alcohol-Infused Jams:
- Add a splash of liqueur or wine, such as Grand Marnier with orange marmalade or red wine with blackberry jam, for an indulgent twist.
Troubleshooting Tips
- Jam Didn’t Set?: Don’t panic! You can fix it by reheating the batch, adding a bit more pectin, and boiling again.
- Too Sweet or Tart?: Balance the flavor by adjusting future batches with lemon juice or reducing sugar slightly.
- Cloudy Appearance?: This often happens if you skip skimming foam from the surface—be sure to remove it during cooking.
Pro Tip: Keep detailed notes on your recipes, including any tweaks or additions. It’ll make recreating your favorites—or improving them—even easier next time!
With these tips and variations, you’re set to customize your jams and jellies to suit your taste and creativity. Have fun experimenting and enjoy every delicious jar!
Serving Suggestions for Sure Jell Recipes
Your homemade jams and jellies are incredibly versatile, and there are countless ways to enjoy them. Here are some creative and delicious serving ideas to make the most of your Sure Jell recipes.
Breakfast Delights
- Spread on Toast: A classic favorite—slather your jam on warm, buttered toast for a simple yet satisfying start to the day.
- Pancakes and Waffles: Use your jelly as a topping instead of syrup for a fruity twist on breakfast staples.
- Yogurt and Granola: Swirl a spoonful of jam into plain yogurt and top with crunchy granola for a quick, healthy snack.
- Bagels and Cream Cheese: Add a dollop of jam to your morning bagel for a sweet and creamy pairing.
Appetizer Ideas
- Cheese Pairings: Serve your jam alongside a cheese platter. Fig jam pairs beautifully with brie, while berry jams complement sharp cheddar.
- Glazed Meatballs: Mix jelly with barbecue sauce to create a tangy glaze for cocktail meatballs or sausages.
- Crostini Toppings: Spread cream cheese or goat cheese on toasted baguette slices and top with a small spoonful of jam for an elegant appetizer.
Lunch and Dinner Enhancements
- Sandwiches: Upgrade your peanut butter and jelly sandwich with your homemade jam for a nostalgic treat. Or try it with turkey or ham for a sweet-savory combo.
- Glaze for Meats: Brush peach or apricot jam over roasted chicken or pork for a glossy, flavorful finish.
- Savory Sauces: Stir your jelly into pan sauces or vinaigrettes for a hint of sweetness in savory dishes.
Dessert Inspirations
- Cake Filling: Use your jam as a filling for sponge cakes, cupcakes, or even a Swiss roll.
- Ice Cream Topping: Warm up your jelly slightly and drizzle it over vanilla ice cream for a quick dessert.
- Tart Glaze: Brush jelly over fresh fruit tarts for a shiny, bakery-style finish.
Creative Uses
- Cocktail Mixers: Stir a spoonful of jam into sparkling water, champagne, or cocktails like a fruity margarita for a fun twist.
- Homemade Gifts: Package your jars with decorative labels and ribbons to create thoughtful, personal gifts for holidays or special occasions.
- Baking Additions: Add a swirl of jam into muffin or bread batter for a surprise burst of flavor.
Pro Tip: Don’t limit yourself to traditional uses—experiment and get creative! A jar of your homemade jam can transform even the simplest dish into something special.
With these serving suggestions, you’ll never run out of ways to enjoy your Sure Jell recipes. Whether it’s for breakfast, snacks, or elegant entertaining, your jams and jellies will add a touch of homemade magic to every meal!
Conclusion
Making homemade jams and jellies with Sure Jell is more than just a culinary task—it’s a creative and rewarding experience that lets you capture the essence of fresh, ripe fruit in every jar. Whether you’re a seasoned jam-maker or a first-timer, this process is straightforward and endlessly customizable.
With the right tools, high-quality ingredients, and a few simple steps, you’ll create jams that are not only delicious but also versatile. From breakfast spreads to creative appetizers and even thoughtful gifts, your Sure Jell recipes will add a touch of homemade magic to every occasion.
Remember, the key to success is preparation, precision, and a bit of creativity. Don’t hesitate to experiment with flavors, textures, and unique pairings to make your preserves truly your own.
So, roll up your sleeves, grab your favorite fruits, and start your jam-making journey today. Every jar you create is a celebration of the vibrant flavors you’ve preserved—perfect for sharing with loved ones or savoring yourself. Happy jam-making!

Sure Jell Recipes
Ingredients
Core Ingredients:
- Sure Jell Pectin: The magic ingredient that ensures your jam sets perfectly every time.
- Fresh Fruit: Choose ripe high-quality fruits for the best flavor. Berries, peaches, apples, and even citrus fruits are great options.
- Granulated Sugar: Essential for balancing the tartness of the fruit and enhancing the flavor. Low-sugar recipes are also possible with Sure Jell’s low-sugar variety.
- Water: Used to dissolve the pectin and create the base mixture.
Optional Add-Ins:
- Lemon Juice or Citric Acid: Helps to enhance the natural flavor of the fruit and ensure proper acidity for preserving.
- Vanilla or Almond Extract: Add a hint of warmth and depth to your jams.
- Spices: Cinnamon nutmeg, or even a pinch of chili powder can elevate your jam with unique flavors.
Tools You’ll Need:
- Large Pot: For boiling the fruit mixture and activating the pectin.
- Canning Jars with Lids: Sterilized jars are essential for proper storage and preservation.
- Ladle and Funnel: To make transferring your jam into jars mess-free.
- Jar Lifter: For safely handling hot jars.
Instructions
Step 1: Gather Your Tools and Ingredients
- Essential Tools: Have a large pot, canning jars, lids, funnel, ladle, and jar lifter ready. A boiling water canner is ideal, but a deep stockpot works too.
- Prepare the Jars: Sterilize the jars by boiling them for 10 minutes or running them through a dishwasher cycle. Keep them warm to avoid cracks when filling with hot jam.
Step 2: Prepare the Fruit
- Wash Thoroughly: Clean your fruit to remove dirt or pesticides.
- Remove Stems and Seeds: For fruits like berries, simply wash and mash. For stone fruits or apples, remove pits, cores, or skins as needed.
- Mash or Chop: Use a potato masher for a chunkier texture or a blender for a smoother finish. Measure the fruit accurately for best results.
Step 3: Combine Fruit and Sure Jell
- Mix Ingredients: In a large pot, combine your prepared fruit and a packet of Sure Jell pectin. Stir well to ensure the pectin is evenly distributed.
- Add Lemon Juice: This step boosts the flavor and ensures the proper acidity for preservation.
Step 4: Bring to a Rolling Boil
- Place the pot over medium-high heat, stirring constantly. Bring the mixture to a rolling boil, one that doesn’t stop bubbling even when stirred.
Step 5: Add Sugar and Boil Again
- Quickly Add Sugar: Pour in the measured sugar all at once, stirring constantly to dissolve.
- Boil for One Minute: Once the mixture returns to a rolling boil, let it boil for exactly one minute. Timing is crucial here!
Step 6: Test the Consistency
- Wrinkle Test: Drop a small amount of the mixture onto a chilled plate. Let it cool for a moment, then push it with your finger. If it wrinkles, your jam is ready. If not, boil for another 30 seconds and test again.
Step 7: Fill the Jars
- Transfer the Jam: Use a ladle and funnel to carefully pour the hot jam into sterilized jars, leaving about ¼ inch of headspace.
- Seal the Jars: Wipe the rims with a damp cloth to remove any residue, then apply the lids and bands, tightening them until just snug.
Step 8: Process the Jars
- Boiling Water Bath: Submerge the jars in a boiling water bath, ensuring they are fully covered. Process for 10 minutes (adjust for altitude if needed).
- Cool and Check Seals: Remove jars with a jar lifter and let them cool at room temperature. Check seals by pressing the lid—if it doesn’t move, the jar is properly sealed.
Step 9: Label and Store
- Mark Your Creations: Label each jar with the date and flavor to keep track of your delicious batches.
- Storage Tips: Store sealed jars in a cool, dark place for up to a year. Once opened, refrigerate and enjoy within a few weeks.
Pro Tip: Don’t be afraid to experiment with flavor combinations! Strawberry-mint or peach-vanilla can add a gourmet twist to your homemade jams. Sure Jell makes it easy to create spreads that are not only delicious but also perfectly set every time.
Notes
Nutrition Information (Per Tablespoon)
- Calories: 50
- Total Fat: 0g
- Saturated Fat: 0g
- Cholesterol: 0mg
- Sodium: 0mg
- Total Carbohydrates: 13g
- Dietary Fiber: 0g
- Sugars: 13g
- Protein: 0g
FAQs
If you’re new to making jams and jellies or just have a few questions, this FAQ section is here to help. Let’s clear up some common queries so you can jam with confidence!
1. Can I Use Any Fruit for Sure Jell Recipes?
Absolutely! Sure Jell works with a wide variety of fruits, from berries and stone fruits to apples and even tropical options like mango or pineapple. Just ensure the fruit is fresh, ripe, and properly prepared for the best results.
2. What’s the Difference Between Regular and Low-Sugar Sure Jell?
Regular Sure Jell is designed for recipes with full sugar, ensuring a firm set. Low-Sugar Sure Jell allows you to reduce the sugar content or use sugar substitutes, making it a great option for healthier jams. Be sure to follow the specific instructions on the packet for each type.
3. My Jam Didn’t Set. What Went Wrong?
This can happen for a few reasons:
The fruit-to-pectin ratio may have been off.
The mixture might not have reached a full rolling boil.
The sugar content might not have been accurate.
To fix it, reheat the jam, add a bit more pectin, and boil again for one minute.
4. How Long Do Homemade Jams and Jellies Last?
Properly sealed jars stored in a cool, dark place can last up to a year. Once opened, keep them in the refrigerator and consume within 3–4 weeks for the best flavor and quality.
5. Can I Double the Recipe?
It’s not recommended. Doubling the recipe can affect the set and consistency of the jam. Instead, make smaller batches for more reliable results.
6. Can I Use Frozen Fruit?
Yes, frozen fruit works well! Thaw it completely and drain any excess liquid before using. This helps maintain the right texture and consistency in your jam.
7. Do I Need a Special Canning Pot?
While a water bath canner is ideal, you can use any deep pot with a lid as long as it’s large enough to fully submerge your jars with 1–2 inches of water above the lids.
8. What’s the Best Way to Store Unused Pectin?
Store unused pectin in a cool, dry place. Be sure to check the expiration date before using it in future recipes to ensure it performs as expected.
9. Can I Adjust the Sweetness After Making the Jam?
Unfortunately, the sweetness level is set during the cooking process. If the jam is too sweet for your taste, consider using it in savory recipes or diluting it as a glaze for meats.
10. How Do I Know If My Jars Are Properly Sealed?
After cooling, press the center of each lid. If it doesn’t flex or make a popping sound, the jar is sealed. If the lid moves, refrigerate the jar and use it within a few weeks.
Pro Tip: Always read the instructions on your Sure Jell packet carefully and don’t hesitate to experiment with flavors once you’re comfortable with the basics. Jam-making is as fun as it is delicious!
Got more questions? Drop them in the comments section, and I’ll be happy to help. Happy jamming!

