Are you tired of the sameIf you’re on the hunt for a quick, healthy, and delicious meal, baked chicken cutlets might just be your new go-to dish. These crispy, golden cutlets are the perfeCt balance of flavor and nutrition, offering a satisfying crunch without the guilt of deep frying. Whether you’re meal prepping for the week or simply looking to add a healthy twist to your dinner routine, baked chicken cutlet recipes are a versatile and easy option Adaptable to meet every flavor preference.
But what makes baked chicken cutlets stand out from the rest? Baking offers a healthier alternative to frying, allowing you to enjoy all the crispy goodness without the excess oil and calories. Plus, with just a few simple ingredients, you can create a mouthwatering dish that’s both nutritious and flavorful. You’re in the right place if you’re wondering how to achieve that perfect golden crust every time or what to pair it with for a complete meal.
In this post, we’ll dive into the world of baked chicken cutlets—exploring easy and healthy chicken cutlet recipes, the key ingredients that make these cutlets so irresistible, and tips to ensure your cutlets are always crispy and juicy. Ready to discover your new favorite way to cook chicken? Let’s get started!

Why Choose Baked Chicken Cutlets?
You’re in the right place if you’ve ever craved that crispy, golden-brown crust on a chicken cutlet but wanted to skip the heavy oi you’re calories of frying. Baked chicken cutlets offer the perfect solution: a healthier, lighter way to enjoy a crispy meal without compromising taste or texture. But why exactly should you consider baking your chicken cutlets over frying them? Let’s explore why baked chicken cutlets should become a staple in your kitchen.
Healthier Option with No Compromise on Taste
When you bake chicken cutlets, you cut down on the excess fat and calories from frying. Baking requires little to no oil, allowing you to enjoy the same crispy texture while making a healthier choice. Using lean chicken breasts and simple, wholesome ingredients, baked chicken cutlet recipes can be tailored to fit any dietary need—whether you’re aiming for lower fat, higher protein, or even gluten-free options.
- Lower fat content – Baking reduces the need for oil, which means less fat is absorbed into the breading.
- Fewer calories – Enjoy a crunchy chicken cutlet without adding the extra calories from frying.
- Healthier alternative – If you’re looking for a clean, nutritious meal that doesn’t sacrifice flavor, baked cutlets are a great choice.
Perfectly Crispy without the Mess
We’ve all been there—frying chicken can be a messy, greasy ordeal. The oil splatters, the cleanup is a headache, and you end up with more grease on your stovetop than on your plate. But baked chicken cutlets eliminate that hassle. You can achieve a perfect crispy crust with minimal effort and mess when you bake your cutlets in the oven.
- Easy to clean up – No more dealing with splattering oil or greasy pans.
- Consistent crispiness – The heat in the oven surrounds the chicken evenly, ensuring a golden-brown, crunchy coating every time.
- Less time spent in the kitchen – Once your chicken is coated and in the oven, you can sit back and relax while it cooks.
Versatility and Customization
Another significant benefit of baked chicken cutlets is their versatility. You can easily customize the flavors and coatings to suit your preferences, whether you enjoy classic, simple seasonings or crave something more adventurous.
- Flavor options – From classic Italian herbs to a zesty lemon pepper or spicy Cajun seasoning, you can easily change the flavor profile.
- Healthier coatings – Opt for whole wheat breadcrumbs or gluten-free panko for a lighter, healthier crust.
- Meal prep friendly – These cutlets store well in the fridge, perfect for meal prep or quick weeknight dinners.
No Need for Special Equipment
Unlike frying, which requires a deep fryer or a lot of oil in a pan, baked chicken cutlets can be prepared with just a few essential kitchen tools: a baking sheet, parchment paper, and an oven. This simplicity makes them ideal for home cooks of all skill levels. Whether you are an experienced cook, you’ll appreciate the ease of preparing this dish with minimal fuss.
- No deep fryer is needed – Just a simple baking sheet and parchment paper.
- Quick prep time – Coat your chicken, pop it in the oven, and you’re ryou’reMinimal cooking equipment – Perfect for a hassle-free cooking experience.
A Delicious Meal for Any Occasion
Whether cooking a busy weekday dinner, hosting a family gathering, or preparing a light dinner with a salad, baked chicken cutlets fit the bill. They’re versatile and can be dressed with your favorite sauces or served as the main dish with roasted vegetables or rice.
- Weeknight meals – A quick and healthy option when you don’t have much time.
- Family-friendly – Kids love the crispy texture, and it’s a meal that its picky eaters will enjoy.
- Elegant dinner – Serve with a light sauce or side dish for a more sophisticated, restaurant-quality meal.
In summary, choosing baked chicken cutlets over fried ones offers numerous benefits, from health advantages and easy cleanup to customizable flavors. They’re the perfect meal for anyone looking to enjoy a crispy, satisfying meal without guilt. Ready to give it a try? Let’s move on to the Let section and dive into the ingredients that make baked chicken cutlets irresistible!
Critical Ingredients for Perfect Baked Chicken Cutlets
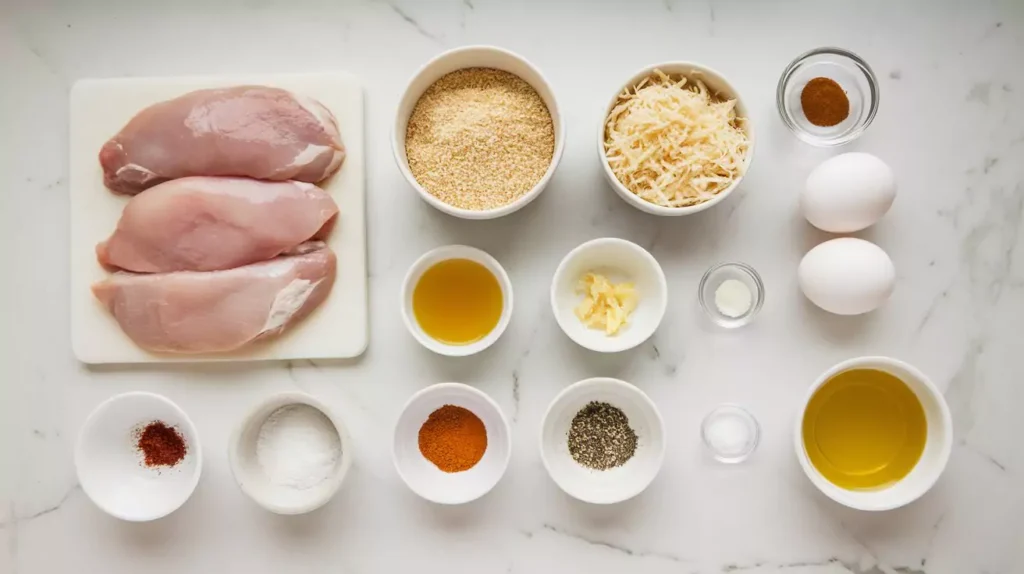
Your ingredients are the secret to making the crispiest, most flavorful baked chicken cutlets. While chicken breasts are the show’s star, the combination of seasonings, coatings, and a few strategic cooking tips takes these cutlets from simple to sensational. Let’s break down the essential ingredients you’ll need to create a perfect batch of healthy chicken cutlets that are both crispy and delicious.
Choosing the Right Chicken
Not all chicken cuts are created equal when it comes to baked chicken cutlets. The ideal choice for a crispy and juicy cutlet is boneless, skinless chicken breasts. Why? They’re lean, easy to use, and cook quickly, making them perfect for a fast meal.
- Boneless, skinless chicken breasts: These are your best bet for lean protein with a tender texture. If you want a slightly juicier cut, you can also opt for chicken thighs, though they may require a slightly longer cooking time.
- Chicken tenders: If you’re looking for a foyou’reicker, kid-friendly option, chicken tenders are excellent. They cook faster and are already portioned, making them perfect for smaller appetites.
Tip: For the best texture, lightly pound the chicken breasts to an even thickness before breading. This ensures the chicken cooks evenly and remains juicy inside.
The Perfect Breading
The breading gives your cutlets that crispy, crunchy exterior everyone loves. But it’s not just about slicing breadcrumbs—it’s about choosing the right type and layering flavors for the perfect crunch.
- Breadcrumbs: Traditional panko breadcrumbs are the gold standard for baked chicken cutlets. Their larger, flakier texture provides the crispiest results when baked. However, if you’re following your green-free diet, you can also go for whole wheat breadcrumbs for a healthier, fiber-packed option or even gluten-free breadcrumbs.
- Parmesan cheese: Mix grated Parmesan cheese into the breadcrumbs for an added savory depth. Not only does it help the coating stick, but it also adds a delicious umami flavor.
- Seasonings: Remember to don’t your breadcrumbs! Adding Italian seasoning, garlic powder, salt, and pepper to your breadcrumbs will enhance the flavor of the cutlets, giving them that extra layer of deliciousness.
Tip: Try using almond flour or ground oats instead of traditional breadcrumbs for a lighter, healthier coating. These alternatives offer a similar crunch but with fewer carbs and added nutrients.
The Binding Agent: Eggs or Alternatives
The binding agent is crucial for helping the breadcrumbs stick to the chicken. Most recipes call for beaten eggs, but you can easily swap them out for alternatives if you want a healthier or egg-free option.
- Eggs: Beaten eggs are the most common choice for binding. They create a smooth coating that helps the breadcrumbs adhere evenly.
- Egg substitutes: If you’re avoiding them, you can use yogurt, buttermilk, or even aquafaba (the liquid from canned chickpeas) as a binder. These alternatives can add a unique flavor while ensuring the breadcrumbs stick to the chicken.
Tip: For extra flavor, marinate the chicken in the binding agent for 10-15 minutes before breading. This allows the flavors to absorb into the meat and keeps the cutlets moist.
Seasoning the Chicken
Keep your child from sitting blandly under all that crispy breading! Before breading, seasoning the chicken is a must to boost its flavor. Here’s how to seaHere’sur chicken to perfection:
- Basic seasoning: Salt, pepper, and garlic powder are the foundational seasonings that will enhance the chicken’s natural flavor.
- Herbs and spices: Add depth with dried Italian herbs, paprika, or onion powder. You can also experiment with flavors like cayenne pepper for a bit of heat or lemon zest for a refreshing citrus kick.
- Marinating: If you have time, marinating the chicken for an hour or two in a simple marinade of olive oil, lemon juice, and garlic will add extra juiciness and flavor.
Tip: Season both the chicken and the breadcrumb coating for a layered burst of flavor in every bite.
Cooking Tools for Success
The right tools make all the difference when baking chicken cutlets. Here’s what you’lHere’s for you’ll crisp and juicy cutlets every time:
- Baking sheet: A flat, rimmed baking sheet is essential for evenly baking chicken cutlets. It allows the heat to circulate the chicken, creating a uniform crisp.
- Parchment paper or silicone baking mat: Line your baking sheet with parchment paper or a silicone mat to prevent sticking and make cleanup a breeze. This also helps the chicken cook more evenly.
- Cooling rack: Place your breaded chicken on a cooling rack set over the baking sheet for extra crispiness. This allows air to circulate the chicken, preventing the bottom from soggy.
By carefully selecting the proper chicken, breading, and seasonings, you can find crispy, golden-brown baked chicken cutlets full of flavor and texture. These key ingredients form the foundation of a dish that’s not only that but also irresistibly tasty. Ready to get cooking? Let’s move on to the Let section and dive into the step-by-step guide to achieving the perfect baked chicken cutlet!

Step-by-Step Guide to Baking Chicken Cutlets
Now that we’ve covered the ingredients for making the perfect baked chicken cutlets, it’s time to dive into the process. You might wonder how you get that golden, crispy crust without frying. The answer is clearer than you assume. With just a few simple steps, you can bake tender chicken cutlets on the inside and perfectly crispy on the outside. Let’s break it: Let the Chicken.
Before we even think about the breading or the oven, the first step is prepping your chicken. Here’s what you nHere’s do:
- Trim the chicken: Trim any excess fat or skin. If you’re using chic, you’re east. You can cut the chicken breasts in half horizontally for a more even cook to create thinner cutlets. This allows them to cook faster and more uniformly.
- Pound the chicken: To ensure the chicken cooks evenly, use a meat mallet to pound the chicken to an even thickness gently. Aim for about 1/2-inch thick. This step is crucial because uneven thickness can lead to dry spots and undercooked sections.
- Season the chicken: Now, it’s time to sensitize the chicken. Mix salt, pepper, and garlic powder to season both sides. For extra flavor and moisture, you can also marinate the chicken for about 15 minutes in olive oil, lemon juice, and a pinch of herbs.
Tip: Take advantage of this. The seasoning makes a massive difference in the final flavor, so be generous with your seasoning.
Prepare the Breading Station
You’ll need to see a simple breading station to get that crispy coating. Here’s how:
- First’s– Flour: Add all-purpose flour (or almond flour for a gluten-free option) in a shallow bowl. This allows the egg mixture to stick to the chicken.
- Second bowl – Egg wash: Beat a couple of eggs in another bowl. You can add a bit of water or milk to thin it out. If you’re looking for a better option, consider using yogurt or aquafaba as a substitute.
- Third bowl – Breadcrumb mixture: In a third bowl, combine your breadcrumbs (panko works best for maximum crunch) with Parmesan cheese and any herbs you like, such as Italian seasoning, garlic powder, and a pinch of paprika for color and flavor.
Tip: If you’re trying to you’re carbs or make your cutlets gluten-free, swap the breadcrumbs for ground oats or crushed nuts. The result will be just as crispy and delicious.
Coat the Chicken
Now that your breading station is set up, it’s time to coat its chicken.
- Dredge in flour: Start by dipping each piece of chicken into the flour, ensuring it’s fully coated. This initial helps the egg wash stick better.
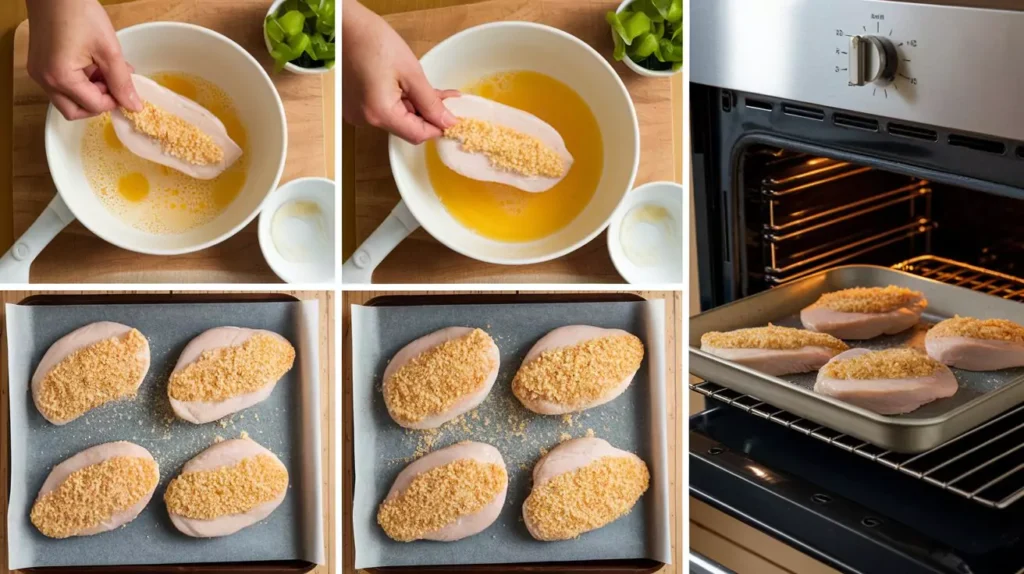
- Dip in egg wash: Dip the floured chicken into the egg mixture, ensuring it’s evenly coated. The egg wash brings the breadcrumbs to the chicken, creating that signature crispy coating.
- Coat with breadcrumbs: Finally, press the chicken into the breadcrumb mixture. Press down gently to ensure the breadcrumbs stick well to the chicken. You can also shake off any excess breadcrumbs to avoid clumps.
Tip: Double-dipping the chicken in the egg wash and breadcrumbs creates an extra-thick, crunchy coating. This method is excellent if you’re craving that extra crispy you’re
Bake to Perfection
Once your chicken is fully breaded, it’s time to bake. This step is about setting the temperature right for that perfect crisp.
- Preheat the oven: Preheat your oven to 400°F (200°C). The higher temperature helps create that crispy texture without drying out the chicken.
- Prepare the baking tray by lining it with parchment paper or a silicone mat. This ensures the cutlets won’t stick and makes cleanup much more accewon’te.
- Place the chicken on the sheet: Arrange the breaded chicken cutlets on the baking sheet in a single layer. Leave a little space between each piece so the heat can circulate and crisp the breading evenly.
- Spray with oil: Lightly spray the chicken with cooking spray or drizzle a small amount of olive oil over the top. This helps the breading turn golden and crispy without deep frying.
- Bake: Place the chicken in the oven for 20-25 minutes, flipping halfway through. The chicken is done when it reaches an internal temperature of 165°F (75°C), and the breading is golden brown.
Tip: Place the chicken on a cooling rack over the baking sheet for extra crispiness. This allows air to circulate the chicken, preventing the bottom from soggy.
Rest and Serve
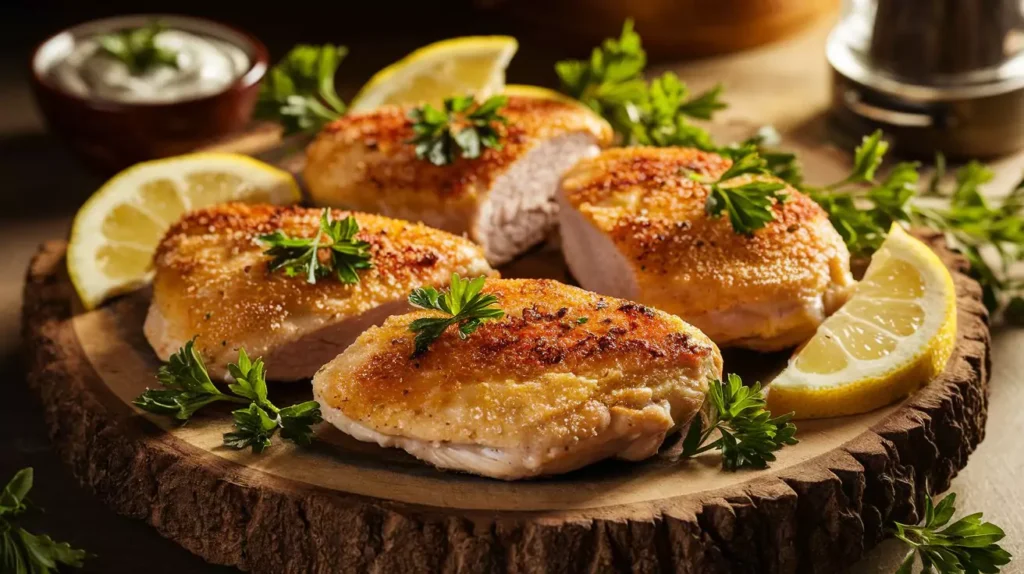
Once the chicken cutlets are done, resist the urge to dig in immediately. Let them rest for a few minutes on a cooling rack to allow the juices to redistribute. This keeps the chicken juicy inside while ensuring the breading remains crispy.
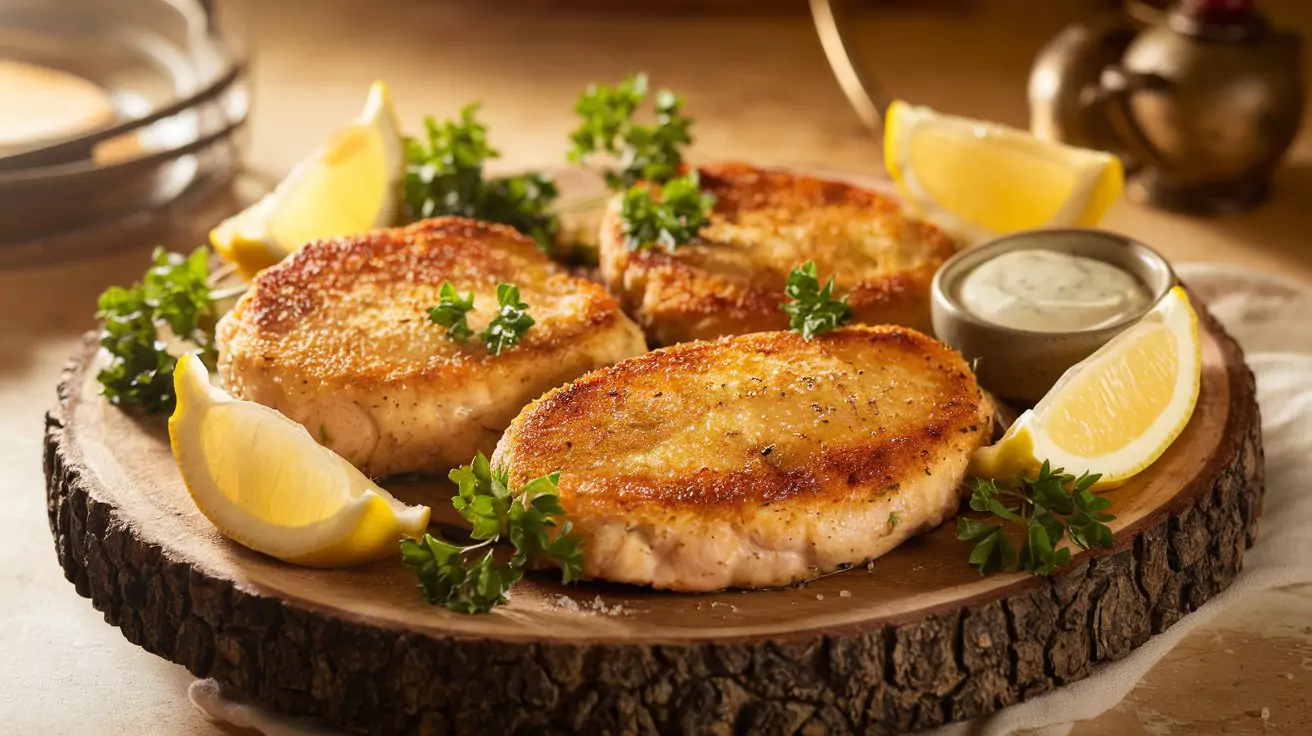
Now you’re ready to serve! Pair your baked chickyou’relets with a fresh salad, roasted veggies, or a dipping sauce—like marinara, honey mustard, or a tangy yogurt-based sauce.

conclusion
Baking chicken cutlets may be a simple process, but following these steps ensures you’ll get perfectly crispy, tender, and flavorful results every time. By prepping the chicken, setting up a proper breading station, and baking at the right temperature, you can enjoy delicious, healthy baked chicken cutlets that rival any fried version. Ready to try it for yourself? Let’s move on to some tasty recipe ideas nexLet’snclusion
There you have it—the ultimate guide to creating the crispiest, healthiest baked chicken cutlets that will impress you. Whether you’re looking for a quick weeknight dinner, your prep favorite, or a crispy, guilt-free treat, baked chicken cutlet recipes offer endless possibilities for customization and flavor.
By following the simple steps we’ve outlined—from choosing the proper chic we’ve to perfect the breading and baking process—you can create tender cutlets with a golden, crispy crust on the outside. And the best part? You don’t have to deal with the mess and excess of frying. Instead, you can enjoy a healthier alternative without compromising on taste.
Have you tried making baked chicken cutlets yet? With so many variations, the options are endless—whether sticking to the classic flavors or experimenting with new seasonings and coatings. And the versatility doesn’t stop there. These crispy chicken cutdoesn’tir perfectly with many sides, from fresh salads and roasted vegetables to creamy dips and hearty grains.
What’s standing in your way from trying it? Grat your oven, and get ready to enjoy a deliciously healthy meal that everyone will love. As you master the art of baking chicken cutlets, you’ll find yourself returning to this recipe repeatedly. Whether feeding the family or impressing guests, you crave something crispy and satisfying.
Remember: the key to success lies in the ingredients, patience, and the willingness to experiment with flavors. So why not start today and see how easy and delicious baked chicken cutlet recipes can be? Happy cooking!
FAQ
1. Can I use chicken thighs instead of chicken breasts for baked cutlets?
Yes, you can use chicken thighs! While chicken breasts are the most common choice for baked cutlets because of their lean, tender texture, chicken thighs can add more juiciness and flavor. Just note that thighs may require a slightly longer cooking time since they’re a bit thicker. Check their temperature to ensure they’re cooked to 165°F (75°C).
2. How can Ithey’reaked chicken cutlets be crispy without frying?
Getting that crispy texture without frying is all about the coating and baking techniques. Use panko breadcrumbs for a lighter and crunchier texture than regular breadcrumbs. Lightly spray the breaded cutlets with cooking spray or drizzle olive oil before baking at a high temperature (around 400°F or 200°C). This helps achieve a golden, crisp crust without excess oil.
3. Can I make baked chicken cutlets gluten-free?
You can easily make gluten-free chicken cutlets by swapping regular breadcrumbs for gluten-free breadcrumbs or using alternatives like almond flour or ground oats. These options still provide a crispy coating but are suitable for those with gluten sensitivities.
4. How long should I bake the chicken cutlets?
Baked chicken cutlets typically take 20-25 minutes at 400°F (200°C). However, the cooking time can vary depending on the thickness of your cutlets. To ensure the best outcome, check the internal temperature with a meat thermometer. Chicken should reach 165°F (75°C) to be fully cooked.
5. Can I prepare the chicken cutlets ahead of time?
Yes! You can bread the chicken cutlets and refrigerate them for up to a few hours before baking. This helps the coating set better. Just bake them within a few hours to ensure the coating stays crisp if you’re meal prepping; baked chicken cutlets well in the fridge for 3-4 days and can To preserve their crispiness, reheat in the oven

